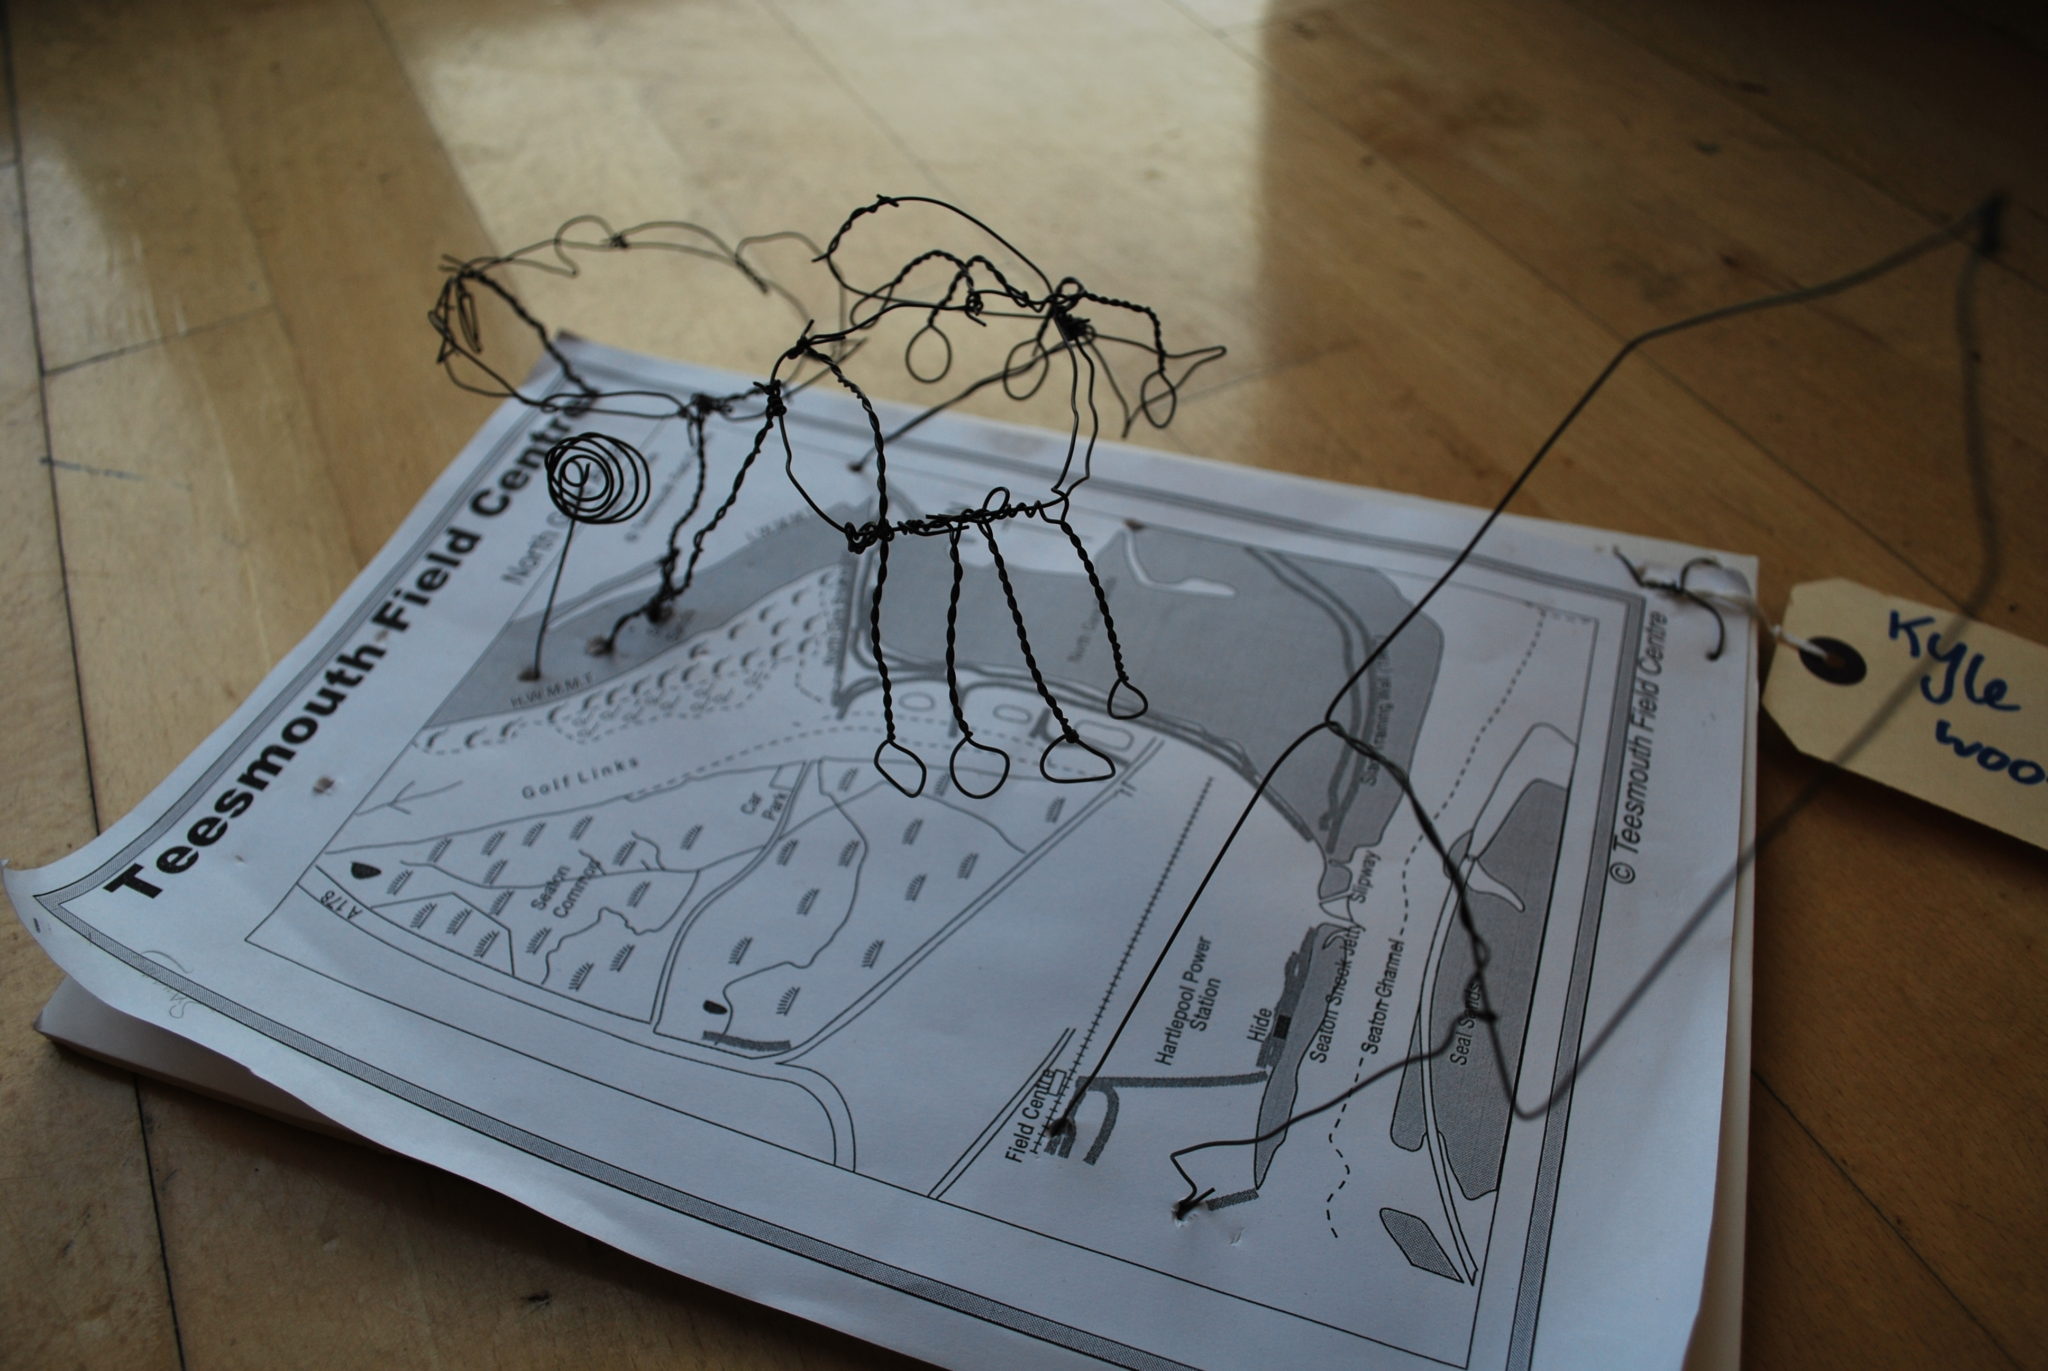
In this activity, participants follow a map to explore an area then represent in sculpture something the map on its own doesn’t say. It is good for practicing map-reading and thinking creatively about the natural world.
The Activity
Artform/Type of Activity
- Drawing
- Observation
- Sculpture
Objectives/Outcomes
- To develop map reading and navigational skills
- To develop fieldwork research skills – recording and using data creatively
- To develop skills and confidence in 2D and 3D artforms
- To explore the use of a range of materials
- Palimpsests – whereby an existing text or document is worked on/ altered to create a new artwork
Materials Required
- (For site visit): sketch books/ drawing implements/ sharpeners/ rubbers
- Knives/ scissors for collecting samples
- Bags for collecting samples
- Hand wash/ gloves
- (For workshop activity): clearly printed maps of the site visited, approximately A4 – one per participant
- Fine malleable wire – floristry or craft wire
- Pliers and wire cutters
- Foam board/s, approximately A4 – enough to back each participants’ work
- Pencils, sharpeners, rubbers
- Drawing paper
- Masking tape
- Glue/ glue spreaders
- (Collected samples from site visit)
- (Drawings from site visit)
Space Requirements
Site visit: natural, open or managed wildlife site
Workshop activity: classroom or workroom with sufficient table top space for all participants to work on
Activity Instructions
- (It may be helpful to practise map reading prior to site visit, using maps of the site to be visited, noting significant features and habitats to be looked out for.)
- Site visit: participants explore the site or part of it, drawing and making written notes on features, species, etc. The line drawings can subsequently be used to form the key to the map.
- Participants can also collect specimens for later reference. Clear rules will be:
- clear guidance to be sought from nature expert on plants that can be harmful to humans (eg Hogweed – Heracleum) or that are protected and should not be disturbed
- only pick a small part of any plant
- no living creatures
- take care around sharp objects, thorns, stinging plants etc: gloves if necessary
- Workshop activity: each participant is given a copy of the A4 map. The group discusses what the map does and doesn’t tell you; what they chose to draw and how those features/ plants etc are or are not represented on the map; what they would like to represent in 3D rather than ‘just’ 2D.
- Participants glue their maps to the foam board/s.
- The Artist/ Teacher/ Leader demonstrates techniques for using the wire to sculpt eg a flower, a tree, a bird. Participants are instructed to leave a ‘stem’ of wire to attach to the foam board.
- Participants make their wire sculpture/s, based on their drawings from the site and/or samples from the site.
- Participants attach their sculptures (3D drawings) at appropriate and relevant locations on their maps; push the wire stem through the paper and foam board, bend the end flush to the back of the board, secure with masking tape.
- Participants can make a key for their maps if there is a suitable ‘empty’ space on the map, and/or can add small drawings and text labels identifying points of interest/ species/ features etc.
Curricular Links
Links to Art and Design through: observation; 2D and 3D; idea development; use of materials; presentation skills
Links to Science through: discovery and identification of habitats and wildlife
Links to Geography through: development of field skills and identification of the characteristics of specific areas; map-reading and map-making
This resource was designed as part of the Green TV project.
PDF Work Sheet
See our A to Z of creative activity resources here.
Funded By
The creation of this resource was made possible by funding from the Heritage Lottery Fund.
